
Good Ideas Stick Around
One of the items I wanted to create prior to the Architectural Digest Design Show was a Round Tray. I thought it would be great way to demonstrate some of my other creative skills by displaying it on top of my credenza, yet time was not on my side. My schedule was jam packed and showtime was coming up fast. It simply had to wait.
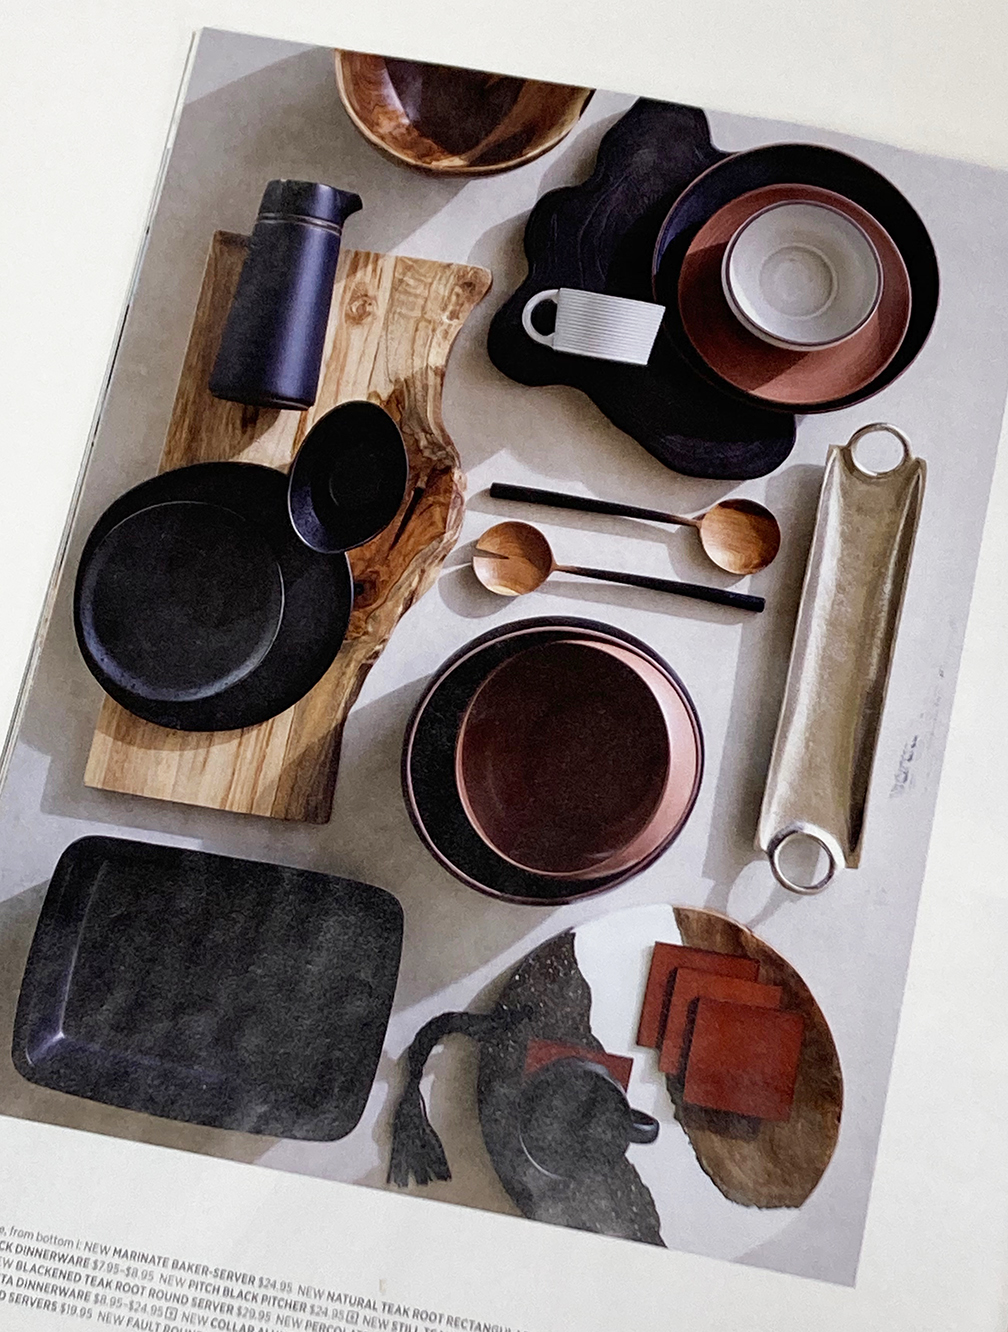
Once I did find the time, I needed an idea. Here’s the inspirational photo I came up with from a Crate and Barrel catalog. For whatever reason, the stacks of dishes and the white background caught my eye. So, please read on and find out what’s involved with creating a round tray. Something I have never done before.
Establishing the Size of My Round Tray
As I have said in previous articles, computer aided design CAD is an amazing tool. You can draw almost anything, adjust the proportions and relationships of each element, and then determine the exact size of each component. Life is simplified, but every now and then, it’s good to just pull out the ruler, verify what you’ve got… and see if it makes sense.
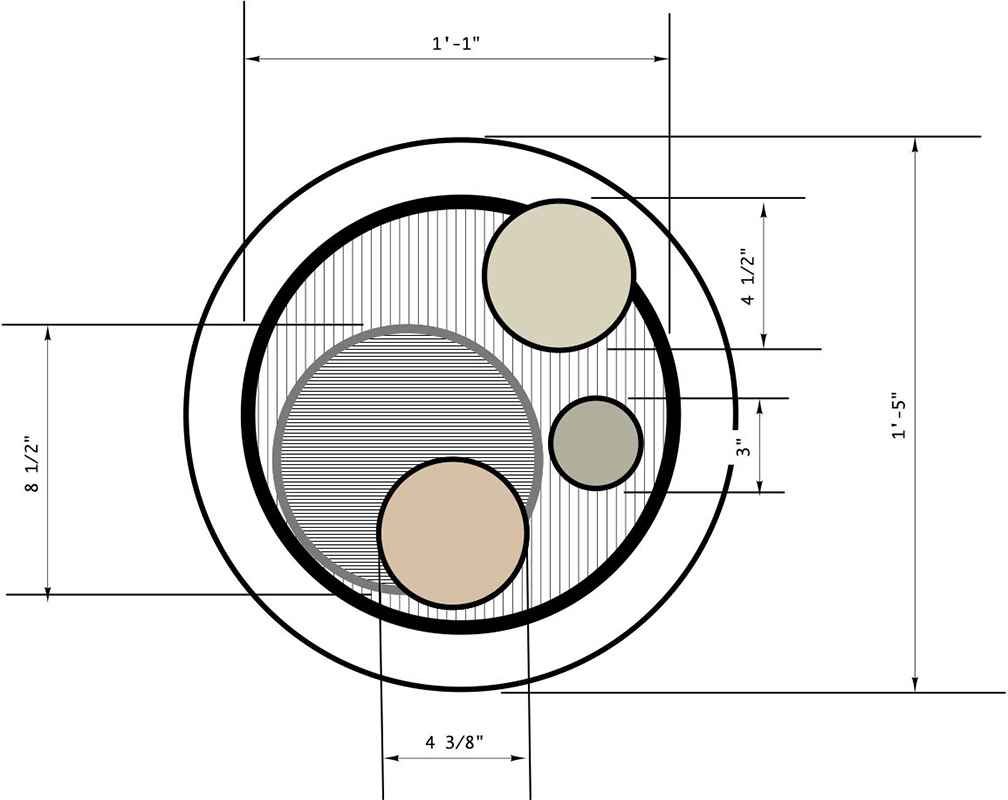
As memory serves, I probably waved my hands around in the air, saying I want it “Yay big” and then worked backwards to determine the size of the center medallion. It wasn’t a very precise beginning, but when I jumped onto the computer and employed my CAD program, it became something quite specific.
Ornamenting My Round Tray
I had a pretty good idea of which veneers I wanted to use for my round tray. Having just completed a large credenza made of white birds eye maple, the thought of using it as my primary disk along with a ring of macassar ebony really appealed. Then I wanted to see a disk of gray koto ringed by black walnut. Followed by some rosewood and then two smaller disks of koto. Each with a black boarder.
Creating Each Disk
The design looks simple enough, but the real challenge involved creating the center field and its companion ring. The first step required making round templates for each pair: a smaller one for the center field and then a larger one that included the boarder.
Moment of Truth
Once the four disks were completed, I couldn’t simply paste them down on top of each other and call it a day. Each had to be carefully cut each into position. So I began with the second largest koto/walnut disk, cutting it into the larger birds eye maple/ebony disk and mounting them together. Then cutting the rosewood/black disk into the koto/walnut disk. And so on.

Every step was nerve wracking. One slip meant that something had to be redone. Thankfully, patience prevailed and each ring/disk combo was successfully cut and taped into position. The whole package was then glued to a backing panel and place in my vacuum press. Pulling the finished product out the next morning was such a rush!
Building My Round Tray
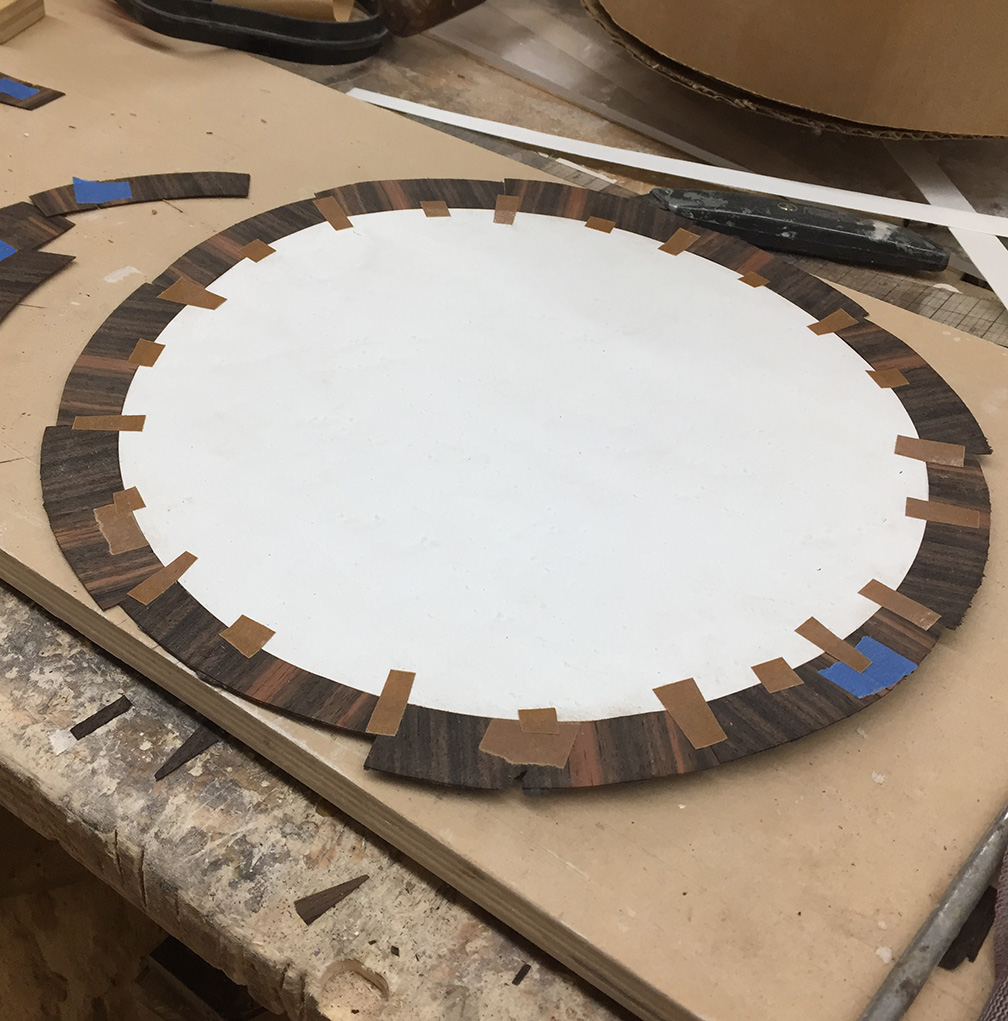
With the medallion completed, it was time to create the actual tray. With a pair of large disks in hand, one missing its center, the two were glued together to create the bottom of the tray. Then the rim slowly emerged as strips of veneer were methodically laminated to the rim of the tray.

This took several days, being that the glue for each strip needed to dry before moving on. Check out the photo and you’ll understand the glacial pace of things, but the results couldn’t have been better!
Making the Handles
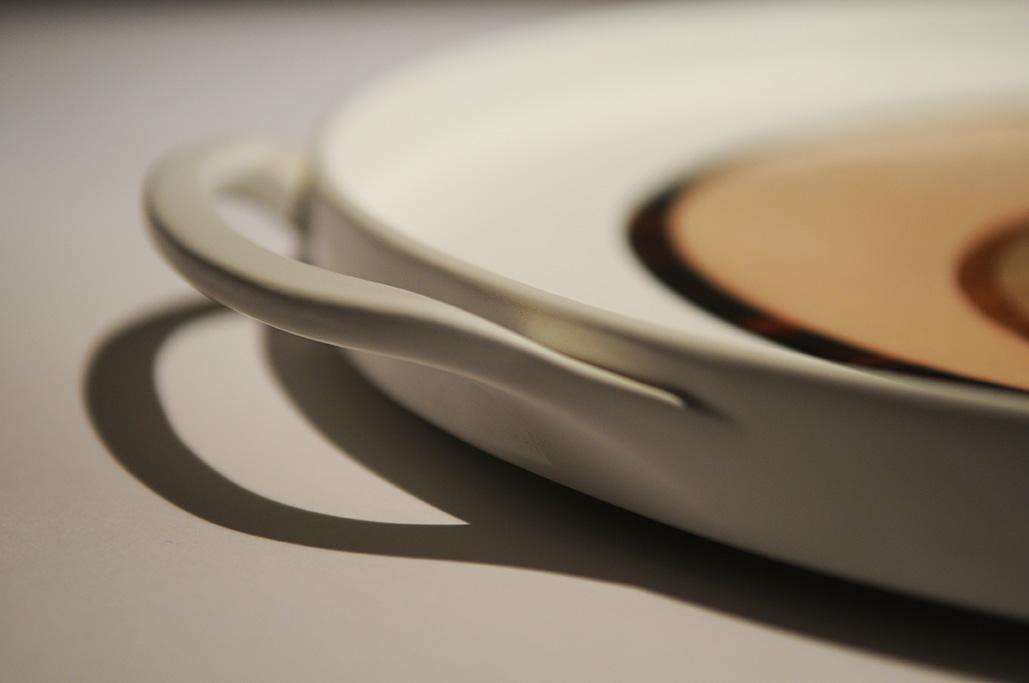
The last step involved creating handles and feet. Each handle was meticulously hand crafted to fit the curve of the tray. The prevailing thought was to have them “flow into and out of” the sides. Smooth curves and transitions were a must. I’m particularly proud of them.


Applying the White Finish
Before mounting the center medallion, the tray needed to be finished. It’s here where the smoothness of a piece, or the lack thereof, is revealed. Several coats of primer and a lot of hand sanding created the smooth transitions I sought for the handles. Then, several layers of white lacquer were applied to complete the tray.
The final step involved mounting the center medallion which was glued into place.

From beginning to end, this probably took about 50-60 hours of work. But there’s nothing better than the feeling of “I’m done. Now let’s move onto the next challenge.” And so I did.